Updated Apr 13, 2023
Goal: To learn to how wind works in nature and how it offers potential as a clean source of energy.
Craft:
Wind Sock
Activity:
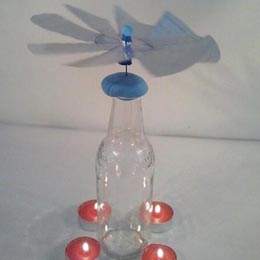
Wind Maker
Game:
Flying Disc
Enjoy your unit’s usual Opening and explain some basic facts about wind and how it can be used by humans to make our lives easier and more enjoyable.
Answers: Simply put, wind is moving air. As we have all experienced, wind can be felt but it cannot be seen. People have been putting wind to work for thousands of years. Sailboats are the original example of vehicles powered by wind, as used by the Egyptians 5,000 years ago to travel the Nile River. Windmills are the oldest machinery to harness the wind’s energy. They were first invented in the Middle East in ancient Persia, were also used in China as early as 2000 years ago. Windmills spread to Europe in the 12th century following the Crusades, and were made most famous by the Dutch who had 10,000 windmills operating until the 1900’s. All of these older examples of windmills were used to do hard jobs such as pump water, grind grain and sugar cane, press oil, saw wood, and run fabric looms until they were replaced by steam power. Most recently, wind turbines (modern windmills) have been invented to use wind to create electricity. Wind turbines are most effective when grouped together. Groups of them are called wind farms and they do the same job as power plants.
Wind socks are used at airports and helicopter landing pads to show the direction and strength of the wind.
For a picture of the finished product see: http://innerchildfun.com/2009/06/easy-waterproof-windsock.html
How is wind created?
During daylight hours the Sun heats the air above the land faster than it heats the air above the water. The warm air over the land rises, and the cool air from above the water moves in to take its place. This movement of air is called wind.
In short, wind occurs because the air above water and the air above land absorb warmth from the Sun at different speeds. Hot air always rises and cold air takes it place lower down.
For the most part, the production of electricity involves burning coal, oil or natural gas, which is hard on the environment. Wind turbines are now helping to create electricity in a cleaner way. Ask the group to think about everything they use in a day that runs on electricity. (The easiest way might be to imagine one room of a house at a time.) Can any of the children remember a time that the power went out in a storm? What changed?
Answers: Light bulbs, clock radios, electric heat, air conditioning, refrigerators, freezers, ovens, microwaves, toasters, blenders, televisions, computers, hair dryers, etc. all rely on electricity.
The first thing you immediately notice when the power goes out is that all the lights turn off. Your family may have to use flashlights or candles to see. It is also harder to cook food and to keep it properly chilled; don’t open the fridge for long! Without TV, movies, video games or computers you may have to play a board game or read a book for fun instead.
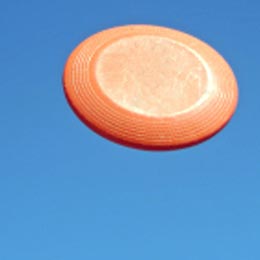
There are many fun recreational activities such as kite flying, kite boarding, wind surfing, parasailing, paragliding, hot air ballooning, and parachuting that make use of the wind. On the other hand, paper airplanes and frisbees are playthings that create the movement of air on a calm day.
Have the group split into partners or trios. In an open space such as a gymnasium or field let the groups play pass or ‘keep away’ with their flying discs. Alternatively, if your group is more interested in a competitive sport, divide them into two teams for Ultimate frisbee.
The basic rules of Ultimate:
Just like in football, the two teams begin at opposite “end zones” and try to advance the disc to the other end zone. However, unlike how a receiver can run with the football, the disc may be advanced only by passing it to a teammate. The player holding the disc has up to 10 seconds to pass the disc and cannot move (except for pivoting on one foot, like in basketball). Defensive players on the other team must stay a minimum of 10 feet/ 3 meters back from the thrower. If a pass is incomplete, intercepted, or caught out of bounds, the opposing team immediately gains possession and tries to move the disc in the other direction. If a team successfully advances the disc into the end zone, that team scores a point. The teams then switch directions and the team that did not just score starts again. No physical contact is allowed between players, nor are picks and screens.
Enjoy your regular Closing and commend the group for learning about how wind is created and how it can be used by humans.
Caduto, Michael J. Catch the Wind, Harness the Sun. North Adams, MA: Storey Publishing,
2011.
Fitzgerald, Stephanie. Wind Power. New York, NY: Chelsea Clubhouse, 2010.
http://innerchildfun.com/2009/06/easy-waterproof-windsock.html
Woelfle, Gretchen. The Wind At Work: An Activity guide to Windmills. Chicago, IL: Chicago
Review Press, 1997.
Photography Credit: Pauline Woodhouse

This Meeting Plan was researched and written by our intern Vanessa Day.